Phone:
0086-757-8938 9313
Email:
Address:
Caochang Industrial Zone, Liguang Rd, Lishui, Nanhai, Foshan, Guangdong, China
24/7 online services

Phone:
0086-757-8938 9313
Email:
Address:
Caochang Industrial Zone, Liguang Rd, Lishui, Nanhai, Foshan, Guangdong, China
24/7 online services
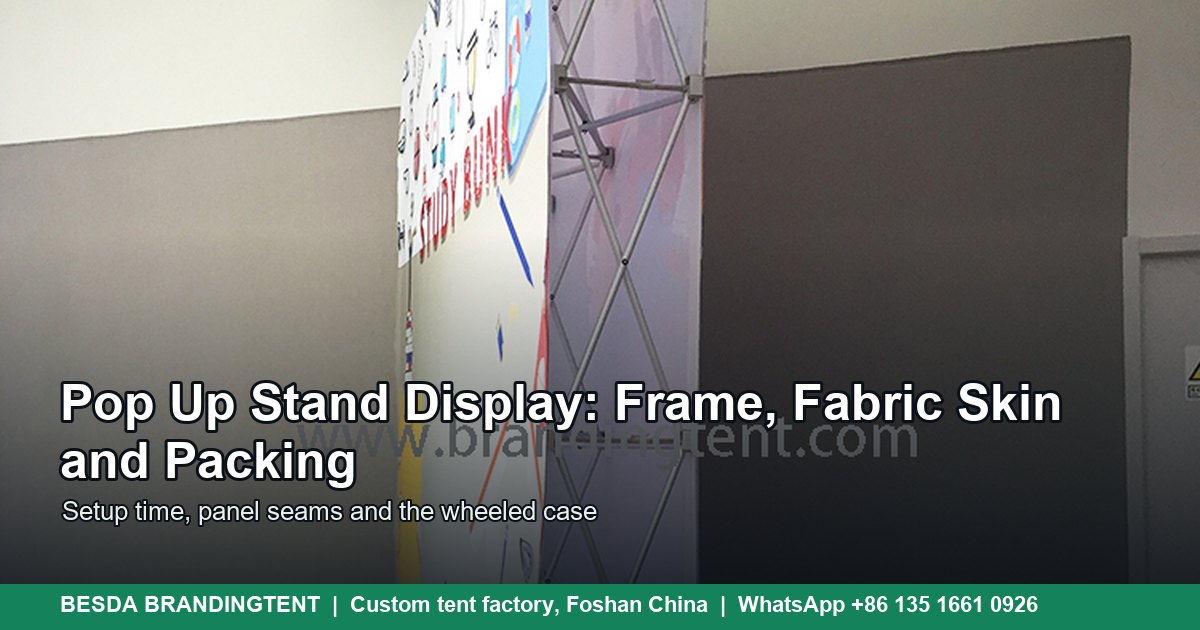
A pop up stand display is a folding aluminium lattice with a printed fabric skin stretched over it, packed into a wheeled case that doubles as a counter. It exists to solve one problem: a booth needs a large printed backwall that one or two people can build without tools and carry in a car. The frame opens in about 2 seconds, the skin takes 5 to 15 minutes, and the whole unit travels at 0.07 to 0.09 CBM. Scope note: this is indoor event furniture for a booth or a showroom, not a wind-rated outdoor structure and not a clear-span marquee hall.
Three parts do three jobs, and buyers who understand the split stop paying for the wrong one.
1. The frame. An aluminium lattice of 17 mm tube with plastic or metal joints, usually in a 3×3 bay layout. It folds into a bundle about 1.0 to 1.2 m long and opens by pulling the centre until the joints lock. The frame carries the load and sets the panel widths.
2. The skin. A tension polyester print at about 220 to 240 gsm, cut into panels that match the bays. It attaches with magnetic strips on most systems, or with a silicone edge on a SEG frame. The skin is the product the visitor sees, and it is the part that gets replaced when the campaign changes.
3. The case. A wheeled soft bag or a moulded case at about 850 x 270 x 250 mm, holding the frame, the rolled panels and the spares. On many stands the case turns into a counter with a printed wrap, which saves a piece of furniture in the van.
That is the whole product. There is no motor, no cable and no structural fixing. A pop up stand is furniture for an indoor booth, and the specification should stay inside those limits.
The two-second number is real, and it is also the most misread figure in the category. It describes one action: the frame going from folded to locked. It does not include unpacking, fitting the skin, aligning the panels, dressing the stand or moving the case.
A realistic schedule for a 3×3 straight stand with one person looks like this:
Two people halve the panel work and remove the tipping risk. One person can do it in 15 to 20 minutes on a standard frame and closer to 20 on a curved or backlit unit. The honest number to give a venue or a client is 15 minutes for a 3×3, not 2 seconds.
There is a second context point. Fabric that has been rolled in a case for a week shows faint fold lines under hall lighting. Most drop out within an hour as the cloth warms. A hand steamer fixes the rest in five minutes. Build that five minutes into the schedule instead of discovering it at the opening.
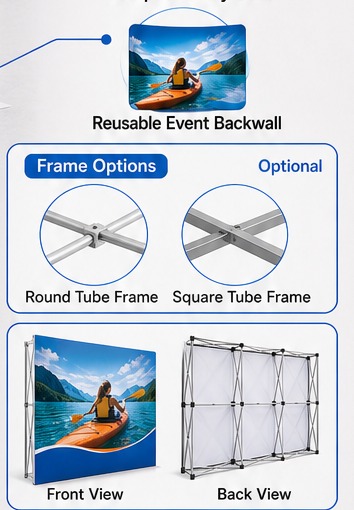
The parts are designed as a system, and each one constrains the others. The frame sets the panel width, the panel width sets the seam positions, and the seam positions set where a logo can sit. The case sets the transport limit, which decides whether the stand travels by car, by courier or in a van with the rest of the booth.
1. Frame and skin. A three-bay frame wants three panels. A four-bay frame wants four. When a buyer asks for a single printed sheet over a 3×3 frame, the skin sags between the bays and the magnets cannot hold the middle. Panel count is not a printer preference; it is how the frame works.
2. Skin and seams. Every panel join is a line across the artwork. On a straight frame the seams run vertically and can be hidden in a colour break. On a curved frame they follow the bow, which is much harder to disguise in a photograph of a face or a product.
3. Case and counter. The wheeled case is 850 to 900 mm tall, which puts a counter surface at about waist height when the case stands on its end. Add a printed wrap and the case earns its freight space as furniture. Buyers who plan for that save a table.
4. Spares. Two magnets, two connectors and a hex key belong in the case. A missing magnet on the morning of a show turns a 15-minute build into a 40-minute one, and no venue has a spare in the right size.
The pop up stand is the default backwall for a booth under about 30 sq m. It also works in a set of places that are not a trade show at all.
In every case the stand is doing the same job: it makes a temporary space look intentional. That is worth a 15-minute build. It is not worth pretending the product is a wall, and no supplier should sell it as one.
The choice is about the booth shape and the artwork, not about which one looks newer.
| Point | Straight pop-up | Curved pop-up |
| Footprint depth | About 0.3 to 0.4 m at the base | About 0.5 to 0.7 m at the centre |
| Graphic panels | Three panels across a 3×3 frame | Three to four panels with a curved join |
| Seam behaviour | Straight vertical seams, easy to design around | Seams follow a curve, harder to hide |
| Sight line | Flat wall, reads as a clean backdrop | Wraps the visitor, reads as a room |
| Booth fit | Better in a narrow 10×10 or a corridor stand | Better in an island or a corner with depth |
| Storage | Folds flat into a slim case | Folds into a deeper case |
| Reprint cost | One panel can be replaced | Curved panels usually reprint as a set |
A straight frame is the safer default. It takes less depth, its seams are predictable and a single panel can be reprinted without touching the others. A curved frame earns its place when the booth has depth and the brand wants the visitor to feel enclosed. In a narrow aisle stand, the curve eats the walkway and the visitor steps around the stand instead of into it.
Three products solve three different problems, and buyers often compare them because they look similar in a catalogue.
| Point | Pop-up backwall | Modular wall | Roll-up banner |
| Coverage | 2.25 x 2.25 m and up | Made to the booth, panel by panel | 0.85 x 2 m per unit |
| Setup | 5 to 15 minutes, one or two people | 30 to 90 minutes with tools | Under 2 minutes |
| Tools | None | Hex key and a level | None |
| Graphic change | Replace one panel | Replace one panel, re-hang the frame | Swap the cassette film |
| Transport | One wheeled case, 15 to 25 kg | Several crates or a trolley | One bag per banner |
| Outdoor use | Indoor only, no wind rating | Indoor, some systems take a light outdoor duty | Indoor, sheltered outdoor only |
| Best job | Reusable booth backwall | Permanent showroom or a shaped stand | Direction, price lists, side messages |
The pattern is simple. A pop-up covers the most area for the least build time indoors. A modular wall gives a shaped stand and a permanent showroom, at the cost of tools and hours. A roll-up carries one message in one narrow strip and builds in under two minutes. Most working booths use a pop-up as the backwall and two roll-ups at the sides, because the two products do different jobs and neither replaces the other.
The seam map is the document that decides whether the stand looks designed or assembled. A 3×3 straight frame carries three panels, so two vertical seams cross the visible face. A curved frame carries three or four panels with a bow.
Four rules keep a layout clean on a panelised skin:
File rules are equally short. Supply vector artwork with fonts outlined, or raster at 150 dpi at the final printed size. Add 25 mm of bleed, keep critical content inside a safe zone, and send Pantone Coated references for brand colours. A 1024 px web image enlarged to a 2.25 m panel is roughly 10 dpi at print size, and the blur is visible from the aisle.
Ask for a printed proof panel or a full-size digital proof with the seam lines drawn on it. The seam lines are the part buyers forget to check, and they are the part that cannot be fixed after print.
The case is where a good stand becomes a bad experience. These are the numbers to check before the first event.
| Item | Typical figure | Check before the show |
| Case size, 3×3 | About 850 x 270 x 250 mm, or 900 x 310 x 320 mm | Door width and lift size at the venue |
| Packed weight | 15 to 25 kg for a 3×3 with graphic | Airline or courier limit for the route |
| Volume | About 0.07 to 0.09 CBM per case | Van load plan and freight class |
| Frame bundle | Folds to a tube about 1.0 to 1.2 m long | Whether the case has a frame sleeve |
| Graphic panels | Three panels, rolled around a core | Roll direction and a clean core |
| Spares | Two magnets, two connectors, one hex key | A spare magnet saves a show |
| Label | Booth number and event name on two sides | Venue handling and storage rules |
Three habits prevent most transport damage. Roll the panels around a core and never fold them, because a crease in a tension fabric shows under hall light for the rest of the show. Keep the frame bundle in its sleeve so the joints do not take the load of the case. Label the case on two sides with the booth number and the event, because venue handlers stack cases by the door and read nothing else.
Storage follows the same logic. A dry, dark store keeps the skin printable for years. A damp store grows mildew along the coating line, and on a light skin the stain is permanent. If the panels come back wet, hang them to dry before they go into the case, even if that means leaving them overnight in a locked office.
The product is the same, but the booth rules and the vocabulary change by market, and both affect the order.
United States and Canada: buyers order by booth size in feet and expect a 3×3 stand to fit the rear 5 ft of a 10×10 space. The height cap of 8 ft (2.44 m) in the rear half is the rule to check, because a stand at 2.3 m plus a light bar can breach it.
United Kingdom and Ireland: halls often ask for a fire certificate reference before the build, and the stand is usually called a pop up display or a fabric backdrop. Confirm the venue shell scheme height, which is commonly 2.44 m.
Germany and Austria: the Messe rule set is strict on wall height and on certificates. Buyers ask for a written fire reference and a dimensioned drawing, and they expect the seam map as part of the approval pack.
Australia and New Zealand: the stand travels further and often by air, so packed weight and case size matter more than the frame finish. A 15 to 25 kg case is the practical limit for a two-person install at a regional venue.
Middle East: halls are cold and dry, which is kind to fabric, but the stand often sits in a large open atrium where the sight line is long. A 3×3 wall can look small in a 4 m aisle, so buyers upgrade to a 4×3 or a pair of stands.
A pop up order should carry a dimension, a weight and a fire reference. Everything else is a preference.
| Item | Typical spec | What to confirm in writing |
| Finished size, 3×3 | About 2.25 to 2.3 m wide and high | Exact outer size with the skin fitted |
| Frame | Aluminium lattice, 17 mm tube, plastic joints | Tube wall thickness and joint grade |
| Frame action | Pops open in about 2 seconds, locks at the joints | Lock type and a spare joint in the box |
| Skin | Tension polyester at about 220 to 240 gsm | Weight, stretch direction and fire reference |
| SEG option | Silicone edge graphic at about 250 to 300 gsm | Channel depth and corner tolerance |
| Panels | Three panels across a 3×3 straight frame | Panel width and seam positions on the drawing |
| Weight | 10 to 17 kg complete for a 3×3 | Packed weight with the case and spares |
| Case | Wheeled soft or moulded case, about 15 to 25 kg loaded | Wheel size and handle height |
| Dye-sub, 150 dpi at full size, Pantone matched | Seam map and a printed proof panel | |
| Use | Indoor only, no wind rating | The venue rule on backwall height, often 8 ft |
The FAB table shows what those numbers deliver on the show floor.
| Feature | Advantage | Benefit |
| Lattice frame that opens in about 2 seconds | The hard part is done before the skin comes out | A two-person team finishes the backwall in 10 minutes |
| Three-panel skin with planned seams | Seams fall on colour breaks, not on faces | No letter is cut in half in the hero photo |
| Tension fabric at 220 to 240 gsm | Hangs flat without steaming on day one | The booth photographs clean at the opening |
| Magnetic strip attachment | One panel can be swapped in minutes | A campaign refresh costs one panel, not a new frame |
| Wheeled case at 0.07 to 0.09 CBM | Fits a car boot and a venue lift | No van hire for a single booth |
| Spares in the box | A lost magnet does not end the show | The stand still builds when a part goes missing |
Straight answer: a pop-up is not worth buying in five situations, and a good supplier will say so before taking the order.
1. Outdoors. The frame has no wind rating and the skin is a sail. A 2.25 m wall tips in a breeze. Use a canopy with ballast or an outdoor banner system.
2. A booth that changes graphics every month. The frame is the cheap part over five years, but the panel reprints and the seam matching add up. A modular wall or a SEG system with replaceable channels may cost less to run.
3. A shaped or double-deck stand. A pop-up builds a flat or bowed wall. It cannot make a corner, a tower or a ceiling. That is a build project, not a display product.
4. A single-use event with no storage. If the stand will be used once and has nowhere to live, rent the backwall and print a banner. A pop-up earns its cost on the second and third use.
5. A site that needs one roof over a crowd. A backwall is a wall. It does not enclose, shade or weatherproof a space, and our canopy range is event-grade, not clear-span marquee halls.
1. Measure the booth, not the catalogue. Write down the width, the depth and the height cap. A 3×3 stand needs 2.3 m of clear height plus the light bar.
2. Choose straight or curved from the booth shape. Narrow aisle stands take straight. Island and corner stands can take curved.
3. Count the panels before you design. Three bays mean three panels and two seams. Design to the frame, not to a flat canvas.
4. Decide the attachment. Magnetic strips suit a fast panel swap. A silicone edge suits a flatter face and a longer install, and it adds weight to the case.
5. Set the reading distances. A hero mark is read from 3 to 10 m; body text sits at 1 to 2 m. Size letters to the distance, not to the layout.
6. Ask for the packed weight and volume. 15 to 25 kg and 0.07 to 0.09 CBM are normal for a 3×3. A heavier case changes the transport plan.
7. Put spares in the order. Two magnets, two connectors and a hex key. The cost is small and the saving is a show.
8. Approve the seam map and a proof panel. Both documents are free at the quotation stage and expensive after print.
A display order runs on documents rather than phone calls, because the frame and the skin are made in different departments and meet at the packing table.
1. Size and panel count. Confirm the finished size with the skin fitted, the bay layout and the number of panels. This is the number the seam map is built from.
2. Seam map and mockup. A drawing showing every panel join over the artwork, with the safe zones marked. Approve it before the printer receives the file.
3. Proof panel. A printed panel at production size in 3 to 7 days. Check the colour, the stitching and the magnet pockets against the drawing.
4. Production. Frame cutting and assembly, printing, cutting and sewing, typically 7 to 15 days after approval. The lot number is recorded against the skin and the frame.
5. Build test. The frame is opened, the skin is fitted and the stand is photographed from the front and the back. The case is packed and reopened to confirm it closes with the spares inside.
6. Packing and documents. Carton list, packed weight, volume in CBM and a spare parts list. Low MOQ orders are accepted, and lead time counts from artwork approval, not from the enquiry.
Ask for the build-test photo with your order number in the frame. It takes the supplier two minutes and it tells you whether the panels were cut for the frame you are paying for.
These ten errors cover most of the pop up problems we are asked to fix after the fact.
A pop up stand display is the fastest way to put a large printed wall behind a booth, and it is a poor way to build anything else. Buy it for the backwall, for the 15-minute install and for the panel swap when the campaign changes. Do not buy it for wind, for a shaped stand or for a monthly redesign.
Three numbers decide a good order: the finished size with the skin fitted, the panel count with the seam map, and the packed weight and volume. Add the fire reference and one Pantone list. With those facts on the purchase order, the stand that arrives is the stand in the proof, and the build on the morning of the show matches the schedule you gave the client.
If the brief needs a roof, a wall that resists weather or a structure over a crowd, this is the wrong product. A backwall stays a backwall, and the canopy range covers shade and shelter at event scale, not clear-span marquee halls.
The frame opens in about 2 seconds. The full stand, frame plus skin plus case placement, takes 5 to 15 minutes with one or two people, and 20 minutes on a first build with the drawing in hand. The two-second figure describes one step, not the job. Anyone quoting two seconds as the setup time has never fitted a print to a lattice frame in a hall with a trolley behind them.
Yes, if the frame is a standard 3×3 at 10 to 17 kg and the skin is a three-panel tension fabric. The sequence is: open the frame on its side, fit the top panel first, stand the frame up, then fit the side panels. A curved frame or a backlit SEG unit is easier with two people because the frame wants to tip while the channels are loaded.
A straight frame builds a flat wall about 0.3 to 0.4 m deep at the base. A curved frame bows forward, takes 0.5 to 0.7 m of depth and wraps the visitor. Straight suits a narrow 10×10 booth and a corridor stand. Curved suits an island or a corner where the stand can breathe. Curved panels usually reprint as a set, which matters when a single panel is damaged.
Send the artwork with the panel widths and ask for a seam map before print. A 3×3 straight frame uses three panels, so two seams cross the face. Place type and faces inside a panel, keep 50 to 100 mm clear of each seam, and design the seam as a colour break if the layout allows. The seam map is the document that prevents the reprint, and it costs nothing at the quotation stage.
No, not as a backwall. The frame has no wind rating, the skin is a sail and the feet are not designed for ground fixing. A light breeze will tip a 2.25 m wall. Outdoors, use a canopy tent with ballast or a purpose-built outdoor banner frame. If the event is under a marquee or in a sheltered courtyard, treat it as an indoor install and keep the stand out of the wind path.
A 3×3 straight frame usually carries three panels, one per bay. Panels attach with magnetic strips or a silicone edge, so a single panel can be replaced without touching the frame. That is the practical reason to keep the seam map and the lot record: a replacement printed two seasons later has to match the other two panels under hall lighting.
| Item | Detail |
| Manufacturer | Besda BrandingTent, display and tent factory in Foshan, China, since 2010 |
| Product scope | Pop up stand displays at 3×3 and custom sizes, straight and curved, plus modular walls and roll-ups |
| Frame | Aluminium lattice with 17 mm tube and locking joints, opens in about 2 seconds |
| Skin | Tension polyester at about 220 to 240 gsm, or SEG at about 250 to 300 gsm |
| Finished size | About 2.25 to 2.3 m wide and high for a 3×3 unit |
| Weight | 10 to 17 kg complete, 15 to 25 kg packed in the case |
| Case | Wheeled case at about 850 x 270 x 250 mm and 0.07 to 0.09 CBM |
| Setup | Frame in 2 seconds, full skin in 5 to 15 minutes with one or two people |
| Use limits | Indoor only, no wind rating, check the venue backwall height rule |
| Printing | Dye-sublimation at 150 dpi at full size, Pantone matched, seam map approved before print |
| Low MOQ | Low MOQ accepted, wholesale pricing scales with quantity |
| Contact | WhatsApp +86 135 1661 0926, [email protected], reply within 1 hour |
Related reading: Pop Up Display vs Roll Up Banner: Which Booth Backwall? · How to Set Up a Pop Up Canopy Alone: One-Person Method · Marquee Tent Packing List: What Goes in the Van · Trade Show Table Covers: 6ft vs 8ft, Throw vs Stretch · Table Cover Logo Placement: Print Zones That Sell
💬 Chat on WhatsApp Now✉ Email Us Now
Custom Roll Up Banners
Portable stands
Custom Table Covers
Fitted and throw 4ft-8ft
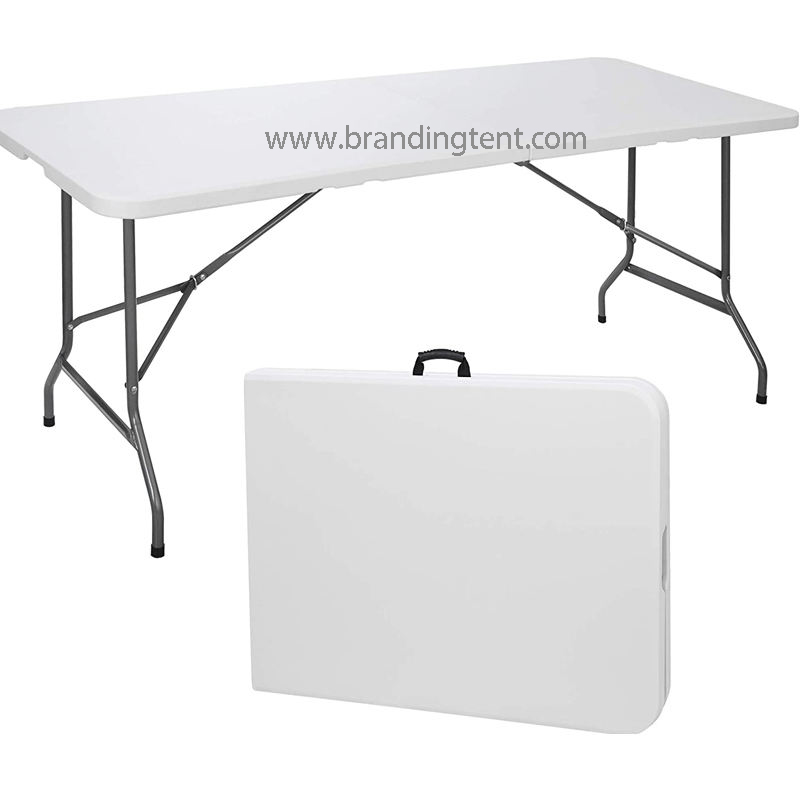
Custom Outdoor Tables
Folding tables 4ft-8ft
Tell us the tent size, the ground and weather it has to handle and the destination market. Our tent specialists reply within 1 hour, 24×7 online service, with a free mockup, written specifications and factory-direct pricing.